Introduction
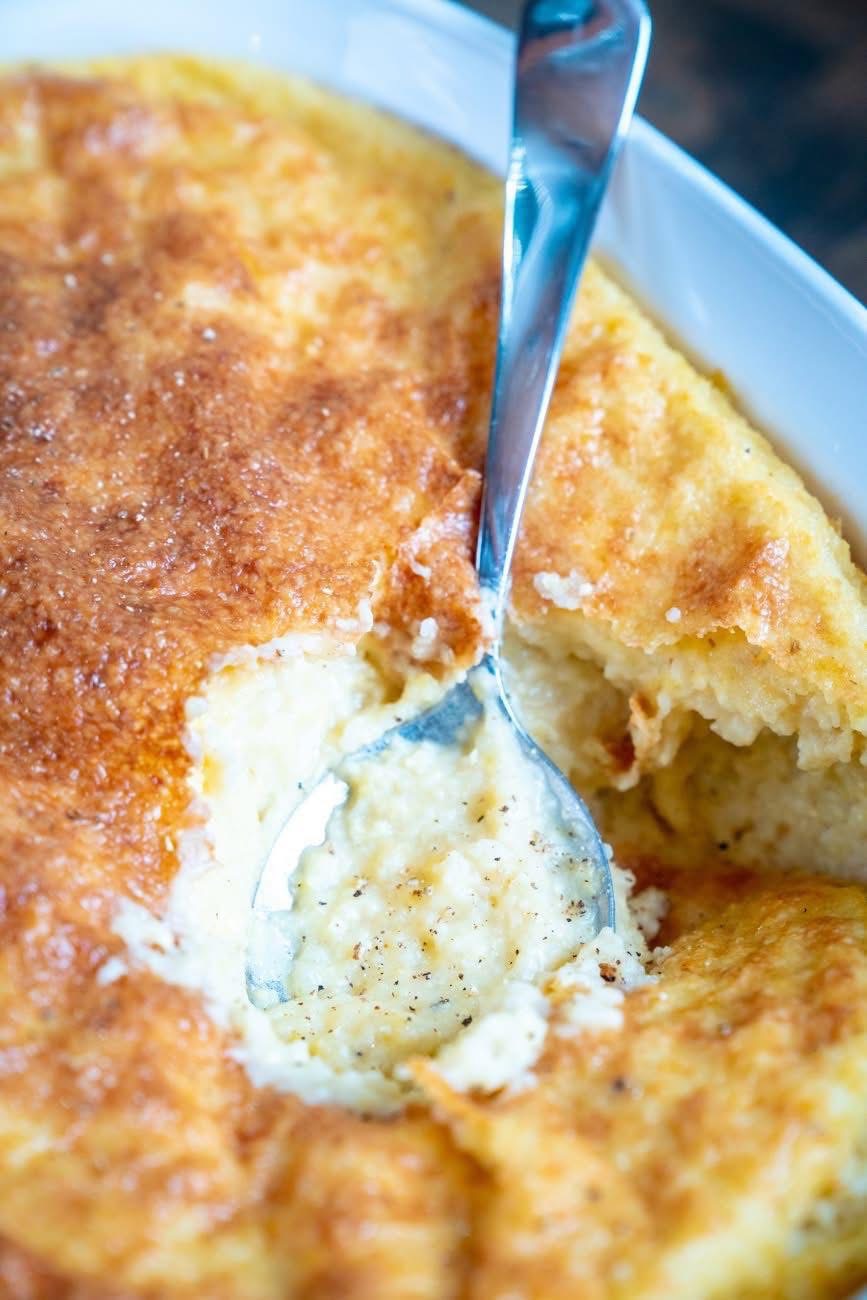
There’s something undeniably comforting and deeply satisfying about a bowl of creamy, cheesy grits. But what if we told you there’s a way to elevate this Southern staple to an even higher plane of deliciousness? Enter Baked Cheesy Grits: a dish that takes everything you love about classic grits – the rich corn flavor, the velvety texture, the generous helping of melted cheese – and bakes it into a golden-brown masterpiece with a delightfully crispy top. This isn’t just a side dish; it’s a culinary hug, a dish that conjures images of cozy mornings, festive brunches, or hearty dinners. Forget standing over the stove, constantly stirring; baking transforms humble grits into a hands-off wonder, creating a perfect, consistent texture throughout with that irresistible, slightly browned crust.
Our recipe for Baked Cheesy Grits isn’t just about convenience; it’s about maximizing flavor and texture. We’re talking a harmonious blend of sharp cheddar and Monterey Jack for that perfect melt and depth, married with creamy dairy and just the right amount of seasoning to make every spoonful sing. The magic happens in the oven, where the grits slowly transform, absorbing all the goodness, becoming incredibly tender on the inside while developing a beautiful, golden-brown crust that begs to be broken. This method ensures a dish that’s not only easy to prepare but also presents beautifully, making it an impressive addition to any meal, from a casual family breakfast to a celebratory holiday spread.
So, get ready to ditch the constant stirring and embrace the ease and elegance of baked grits. Whether you’re a long-time grits lover or a curious newcomer, this recipe promises to deliver the ultimate comfort food experience. It’s rich, it’s creamy, it’s cheesy, and it’s baked to perfection, making it the ideal side dish, breakfast, or even a light main course. Prepare to fall in love with the golden goodness that is Baked Cheesy Grits – your new favorite way to enjoy this beloved Southern classic.
Nutritional Information
Per serving (approximate values):
- Calories: 380
- Protein: 18g
- Carbohydrates: 30g
- Fat: 20g
- Fiber: 2g
- Sodium: 650mg
Ingredients
- 1 cup stone-ground or quick-cooking grits (not instant)
- 4 cups whole milk
- 1 cup water
- 1 teaspoon salt, plus more to taste
- 1/2 teaspoon black pepper, freshly ground, plus more to taste
- 1/4 teaspoon cayenne pepper (optional, for a subtle kick)
- 1/2 cup (1 stick) unsalted butter, divided
- 8 ounces sharp cheddar cheese, shredded
- 4 ounces Monterey Jack cheese, shredded
- 1/4 cup heavy cream (optional, for extra richness)
- 2 tablespoons chopped fresh chives or green onions, for garnish (optional)
Instructions
- Prepare Your Baking Dish:Preheat your oven to 375°F (190°C). Lightly grease a 9×13-inch baking dish with butter or non-stick spray.
- Combine Liquids and Seasonings: In a large, heavy-bottomed saucepan or Dutch oven, combine the whole milk, water, 1 teaspoon salt, 1/2 teaspoon black pepper, and cayenne pepper (if using). Bring the mixture to a gentle boil over medium-high heat, stirring occasionally to prevent scorching.
- Add Grits: Once the liquid is boiling, slowly whisk in the grits in a steady stream to prevent lumps. Reduce the heat to low, cover the saucepan, and simmer, stirring occasionally, until the grits are thick and creamy. For stone-ground grits, this will take about 20-25 minutes. For quick-cooking grits, it will be closer to 5-7 minutes. Make sure to stir regularly, especially towards the end, to prevent sticking.
- Stir in Butter and Cheese:Remove the saucepan from the heat. Add 6 tablespoons of the unsalted butter (reserving the remaining 2 tablespoons for later) and stir until completely melted and incorporated. Gradually add the shredded cheddar cheese and Monterey Jack cheese, stirring continuously until all the cheese has melted and the grits are smooth and homogenous. If using, stir in the heavy cream at this stage for an extra luxurious texture. Taste and adjust seasoning with more salt and pepper as needed.
- Transfer to Baking Dish: Pour the creamy, cheesy grits into the prepared 9×13-inch baking dish, spreading evenly with a spatula.
- Dot with Remaining Butter: Cut the remaining 2 tablespoons of cold butter into small pieces and dot them over the top surface of the grits. This will help create that beautiful golden crust.
- Bake to Golden Perfection:Place the baking dish in the preheated oven and bake for 25-30 minutes, or until the grits are bubbly around the edges and the top is beautifully golden brown and slightly crisp. If you desire a darker crust, you can briefly place it under the broiler for 1-2 minutes at the end, watching carefully to prevent burning.
- Rest and Serve: Once baked, remove the grits from the oven and let them rest for 5-10 minutes. This resting period allows the grits to set slightly, making them easier to scoop and ensuring they hold their creamy texture. Garnish with fresh chopped chives or green onions, if desired, and serve warm.
Cooking Tips and Variations
To achieve the absolute best Baked Cheesy Grits, the type of grits you use truly matters. While quick-cooking grits work well for convenience, stone-ground grits offer a superior, more robust corn flavor and a delightful texture that holds up beautifully to baking. If using stone-ground, be sure to adjust your stovetop cooking time accordingly, as they require a longer simmer. When selecting your cheese, don’t skimp on quality. A good sharp or extra-sharp cheddar will provide that essential tangy depth, while Monterey Jack contributes a fantastic melt and mild creaminess. Feel free to experiment with other melting cheeses like Gruyere for a nutty note or a touch of smoked gouda for an added dimension of flavor. The key is to use freshly grated cheese, as pre-shredded varieties often contain anti-caking agents that can affect melt and texture.
Seasoning is crucial for truly flavorful grits. Don’t be afraid to taste and adjust the salt and pepper throughout the process. A pinch of cayenne pepper, while optional, adds a subtle warmth that complements the richness of the cheese without making the dish overtly spicy. For an even more luxurious texture, consider adding a couple of tablespoons of cream cheese or mascarpone along with the other cheeses. This will make your grits incredibly velvety and rich. The final dotting of butter on top before baking is not just for flavor; it’s essential for achieving that irresistible golden-brown crust. The fat helps to crisp up the surface, creating a beautiful contrast to the creamy interior.
There are numerous ways to customize your Baked Cheesy Grits. For a hearty breakfast or brunch option, stir in crispy, crumbled bacon or cooked breakfast sausage along with the cheese. If you like a bit of heat, finely diced jalapeños (seeded for less heat) or a dash of hot sauce can be incorporated. For an herbivorous twist, fresh thyme, rosemary, or finely chopped scallions can be stirred in. You can also make this a more substantial main course by adding cooked shrimp or crawfish during the cheese-mixing stage. For a different flavor profile, consider swapping out some of the milk for chicken or vegetable broth, which will add an extra layer of savory depth to the grits. Always ensure your ingredients are at room temperature, especially the dairy and cheese, as this helps them incorporate smoothly into the hot grits without cooling them down too much.
Achieving the perfect texture is all about the liquid-to-grits ratio and careful stirring. While cooking on the stovetop, keep the heat low and stir frequently to prevent sticking to the bottom of the pan and ensure even cooking. The grits should be thick but still pourable before going into the baking dish. If they seem too thick, you can always add a splash more milk or water until you reach the desired consistency. Conversely, if they’re too thin, continue to simmer gently, stirring, until they thicken. The resting period after baking is not to be skipped; it allows the grits to set and become perfectly scoopable, preventing them from being too loose and runny when served. This brief rest also intensifies the flavors. For an extra special touch, a sprinkle of smoked paprika or a drizzle of truffle oil over the top before serving can elevate the dish even further.
Storage and Reheating
Baked Cheesy Grits are fantastic for meal prepping or enjoying leftovers. To store, allow the grits to cool completely to room temperature. Once cooled, transfer them to an airtight container. They can be stored in the refrigerator for up to 3-4 days. For longer storage, you can freeze baked grits. Place cooled grits in a freezer-safe container or individual portions in freezer bags for up to 2-3 months. Thaw frozen grits in the refrigerator overnight before reheating.
Reheating baked grits is simple. For individual portions, microwave on medium power, stirring occasionally, until heated through. You might need to add a splash of milk or water to restore creaminess, as grits tend to thicken upon cooling. For larger portions, transfer the grits to an oven-safe dish, add a few splashes of milk or water, cover with foil, and reheat in a preheated oven at 325°F (160°C) for 20-30 minutes, or until warmed through. Stir gently halfway through to ensure even heating and to reincorporate any added liquid. The key to successful reheating is to reintroduce moisture and heat gently to prevent them from drying out or becoming rubbery.
Frequently Asked Questions
Can I use instant grits for this recipe?
While instant grits are convenient, they are highly processed and will not yield the same creamy texture or rich corn flavor as stone-ground or even quick-cooking grits. For the best results in this baked recipe, we highly recommend avoiding instant grits to ensure a truly satisfying and flavorful dish.
My grits are too thick/thin after cooking on the stovetop. What should I do?
If your grits are too thick, stir in a little extra warm milk or water, a tablespoon at a time, until you reach a creamy but still thick consistency. If they are too thin, continue to simmer them gently on low heat, stirring frequently, until they thicken to your desired consistency before adding the cheese and butter.
Can I make Baked Cheesy Grits ahead of time?
Yes, you can prepare the grits mixture up to the point of baking, pour it into your baking dish, cover it tightly, and refrigerate for up to 24 hours. When ready to bake, allow the dish to come closer to room temperature for about 30 minutes before baking, and you may need to add an extra 5-10 minutes to the baking time.
What is the best way to get a crispy golden crust?
Ensure your oven is preheated to the correct temperature (375°F/190°C). Dotting the top with butter before baking helps significantly. If after 25-30 minutes the top isn’t as golden as you’d like, you can carefully place the dish under a broiler for 1-2 minutes. Watch it constantly, as broiler heat is intense and can burn quickly.